
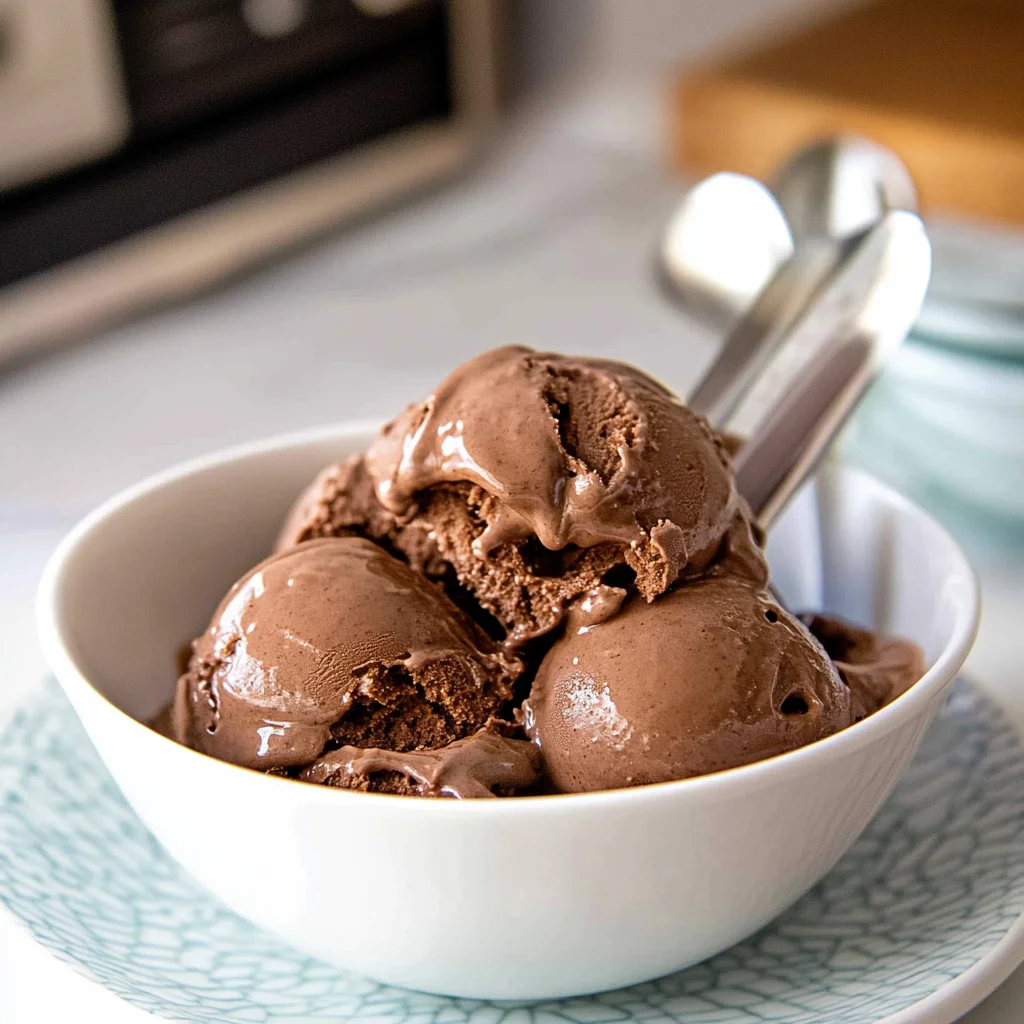
As the rich aroma of freshly churned Old-Fashioned Homemade Chocolate Ice Cream wafts through the air, it’s hard not to feel a wave of nostalgia wash over you. The silky-smooth texture and decadent chocolate flavor evoke cherished memories of summer days spent in the backyard, laughter echoing as we chased each other with melting cones in hand.
Picture this: a warm evening gathering with friends and family, where each scoop brings back the joy of childhood treats and sweet connections. This timeless dessert not only satisfies your cravings but also ignites conversations filled with smiles and delight, making it the perfect centerpiece for any occasion. Get ready for a flavor explosion that will have everyone asking for seconds!
Why Does Everyone Love Old-Fashioned Homemade Chocolate Ice Cream?
Rich and creamy texture that melts in your mouth, thanks to the perfect blend of heavy cream and whole milk. Simple ingredients make this recipe accessible for everyone, allowing you to whip up a delightful dessert in no time. Decadent cocoa powder delivers an intense chocolate flavor that satisfies any sweet tooth. Versatile mix-ins, like chocolate chips, let you customize each batch for family favorites. With just 20 minutes of prep and 30 minutes of cooking, you’ll have a nostalgic treat that brings everyone together around the table!
Old-Fashioned Homemade Chocolate Ice Cream Ingredients
- For the Base
- 2 cups Heavy Cream – This rich cream provides a velvety texture that makes your ice cream irresistibly smooth.
- 1 cup Whole Milk – Whole milk helps to balance the richness and adds a creamy consistency.
- 3/4 cup Granulated Sugar – Sugar sweetens the ice cream perfectly, enhancing the chocolate flavor.
- 1 cup Unsweetened Cocoa Powder (Sifted) – Sifting ensures a smooth texture while delivering deep chocolate richness in every bite.
- 1 teaspoon Vanilla Extract – Vanilla adds warmth and depth, complementing the chocolate beautifully.
- 1 pinch Salt – A touch of salt enhances all the flavors, making them pop in this Old-Fashioned Homemade Chocolate Ice Cream.
- Optional Mix-ins
- 1/2 cup Chocolate Chips (For added texture) – Adding chocolate chips provides delightful bursts of extra chocolate goodness throughout your creamy treat.
How to Make Old-Fashioned Homemade Chocolate Ice Cream
1. Combine Ingredients: In a saucepan, combine 2 cups of heavy cream, 1 cup of whole milk, 3/4 cup of granulated sugar, 1 cup of sifted unsweetened cocoa powder, and a pinch of salt. Heat over medium heat while whisking continuously until the mixture is smooth and the sugar dissolves completely.
2. Add Vanilla: Once the mixture is heated through, remove it from the heat and stir in 1 teaspoon of vanilla extract. Allow this delicious concoction to cool to room temperature so the flavors can meld beautifully.
3. Chill Mixture: After cooling, place the mixture in the refrigerator for at least 2 hours or until thoroughly chilled. This step is crucial for achieving that creamy texture when you churn it!
4. Churn Ice Cream: Pour the chilled mixture into your ice cream maker and churn according to the manufacturer’s instructions. You’ll know it’s ready when it reaches a soft-serve consistency—creamy and inviting!
5. Freeze: Transfer your luscious ice cream to an airtight container. If you like extra texture, fold in 1/2 cup of chocolate chips here! Freeze for at least 4 hours or until it’s firm enough to scoop.
Optional: For an indulgent touch, serve with a drizzle of chocolate syrup on top.
Exact quantities are listed in the recipe card below.
Tips for the Best Old-Fashioned Homemade Chocolate Ice Cream
- Sift Cocoa Powder: Sifting the unsweetened cocoa powder helps prevent clumps, ensuring a smoother, richer chocolate flavor in your ice cream.
- Whisk Continuously: When heating the mixture, whisk continuously to fully dissolve the sugar and cocoa powder, avoiding any graininess in your final product.
- Cool Completely: Allow the mixture to cool to room temperature before refrigerating. This step prevents ice crystals from forming and ensures a creamy texture in your Old-Fashioned Homemade Chocolate Ice Cream.
- Chill Thoroughly: Don’t rush the chilling process—refrigerate for at least 2 hours. A well-chilled base churns more efficiently and yields a fluffier ice cream.
- Fold Gently: If adding chocolate chips, fold them in gently after churning. This prevents them from sinking to the bottom and creates an even distribution throughout your ice cream.
How to Store and Freeze Old-Fashioned Homemade Chocolate Ice Cream
- Freezer: Store your Old-Fashioned Homemade Chocolate Ice Cream in an airtight container for up to 2 weeks to maintain its creamy texture and rich flavor.
- Fridge: If you have leftovers, keep them covered in the fridge for up to 3 days, but note that it may lose some of its creamy consistency.
- Wrapping: For best results, press a piece of parchment paper directly onto the surface of the ice cream before sealing the container, preventing ice crystals from forming.
- Mix-ins: If using chocolate chips or other mix-ins, consume within 1 week for optimal freshness and texture, as they can affect the overall quality over time.
Old-Fashioned Homemade Chocolate Ice Cream Your Way
Feel free to get creative and make this rich treat truly your own with these delightful twists!
- Dairy-Free: Substitute coconut milk for heavy cream and almond milk for whole milk for a creamy vegan version. This swap brings a subtle coconut flavor that pairs beautifully with chocolate.
- Minty Fresh: Add 1 teaspoon of peppermint extract to the base mix for a refreshing twist. It’s like enjoying a classic chocolate ice cream with a surprise coolness in every bite!
- Nutty Crunch: Stir in 1/2 cup of chopped nuts, such as pecans or hazelnuts, before freezing. The added texture not only elevates the flavor but also gives you a satisfying crunch to enjoy.
- Spicy Kick: Mix in 1/2 teaspoon of cayenne pepper or cinnamon for a warm undertone. This unexpected heat can elevate your dessert experience and leave your taste buds tingling!
- Coffee Lovers: Incorporate 1 tablespoon of instant coffee granules into the mix for a mocha delight. The coffee enhances the chocolate flavor, creating an indulgent experience perfect for any caffeine enthusiast.
- Fruit Fusion: Blend fresh raspberries or strawberries into the mix before freezing for a fruity twist. This addition balances the richness of chocolate and adds a burst of natural sweetness.
- Caramel Swirl: Drizzle caramel sauce into the mixture just before it sets in the freezer. This creates delicious ribbons of sweet caramel that complement the chocolate beautifully.
- Rocky Road: Add 1/2 cup of mini marshmallows and chopped walnuts to give it that classic rocky road feel. It’s like turning your homemade ice cream into a delightful adventure with every spoonful!
Make Ahead Options

Preparing Old-Fashioned Homemade Chocolate Ice Cream is a delightful way to simplify your dessert planning, making it perfect for meal prep. You can easily combine the base ingredients—2 cups of heavy cream, 1 cup of whole milk, 3/4 cup of granulated sugar, 1 cup of sifted unsweetened cocoa powder, 1 teaspoon of vanilla extract, and a pinch of salt—up to 24 hours in advance. To do this, start by heating the heavy cream and whole milk with the sugar and cocoa powder until smooth before cooling it down and refrigerating for at least 2 hours. Once chilled, churn according to your ice cream maker’s instructions. After churning, you can transfer the ice cream to an airtight container and fold in 1/2 cup of chocolate chips if desired. For optimal flavor and texture, freeze for at least 4 hours or up to 3 days before serving your rich and creamy treat! This approach not only saves time but also ensures that your Old-Fashioned Homemade Chocolate Ice Cream is ready whenever you’re craving a classic dessert.
Old-Fashioned Homemade Chocolate Ice Cream Recipe FAQs
What type of cocoa powder should I use for this recipe?
For the richest flavor, I recommend using high-quality unsweetened cocoa powder. Sift it before measuring to avoid clumps, which will help ensure a smooth and creamy ice cream base.
How long can I store the homemade chocolate ice cream?
You can store your Old-Fashioned Homemade Chocolate Ice Cream in an airtight container in the freezer for up to 2 weeks. To keep it at its best texture, make sure it’s well-sealed to prevent ice crystals from forming.
Why is my ice cream not freezing properly?
Improper freezing can occur if the mixture isn’t chilled thoroughly before churning. Be sure to refrigerate the mixture for at least 2 hours until it’s completely cold. If you notice it’s still soft after churning, try transferring it to the freezer for additional time—ideally 4 hours or until firm.
Can I use a different type of milk or cream?
Absolutely! If you want a lighter version, you can substitute whole milk with 2% or even almond milk. However, keep in mind that using lower-fat options may result in a less creamy texture. You could also replace heavy cream with coconut cream for a dairy-free alternative without sacrificing richness.
What are some good mix-ins for this chocolate ice cream?
While chocolate chips add delightful texture, you can get creative! Consider adding crushed nuts, marshmallows, or even swirls of peanut butter or caramel during the last few minutes of churning for extra flavor dimensions.
How many servings does this recipe yield?
This recipe yields approximately 4 servings of rich and creamy chocolate ice cream, with each serving containing about 300 calories. It’s perfect for sharing with family or friends during those special moments!
Old-Fashioned Homemade Chocolate Ice Cream
Ingredients
Method
- In a saucepan, combine the heavy cream, whole milk, sugar, cocoa powder, and salt. Heat over medium heat, whisking continuously until the mixture is smooth and the sugar is dissolved.
- Remove from heat and stir in the vanilla extract. Let the mixture cool to room temperature.
- Once cooled, refrigerate the mixture for at least 2 hours or until thoroughly chilled.
- Pour the chilled mixture into an ice cream maker and churn according to the manufacturer's instructions until it reaches a soft-serve consistency.
- Transfer the ice cream to an airtight container. If desired, fold in chocolate chips. Freeze for at least 4 hours or until firm.
Nutrition
Notes
Tried this recipe?
Let us know how it was!Pin This Recipe for Later
Love this recipe? Save this pin to your Pinterest boards to keep it handy whenever you need it!