
Delicious Prickly Pear Margarita Recipe for Refreshing Summer Sips

When the sun’s up and the temperature is rising, there’s nothing quite as refreshing or eye-catching as a Prickly Pear Margarita. Picture this: a vibrant pink cocktail garnished with slices of prickly pear, served over ice, and sprinkled with a light rim of salt. With every sip, the sweet and slightly tangy notes dance across your palate, instantly transporting you to a sun-soaked beach or a lively rooftop party. Imagine clinking glasses with friends, laughter bubbling over as you indulge in this unique summer delight that is simply bursting with flavor. The great thing about a Prickly Pear Margarita is that it’s not just a drink; it’s a celebration in a glass. Whether you’re hosting a backyard barbecue, celebrating a milestone, or simply unwinding after a long day, this cocktail fits the occasion perfectly. It’s as if the cactus plant itself turned into a party bartender, introducing you to an unexpected yet delightful flavor experience. You’ll find yourself reminiscing about sunlit adventures every time you sip on this colorful concoction. Ingredients for Prickly Pear Margarita Here’s what you’ll need to make this delicious Prickly Pear Margarita: 1 cup prickly pear puree – Look for ripe prickly pears at your local grocery store or farmer’s market. The brighter the color, the sweeter the puree. 1/2 cup tequila – Opt for a good quality tequila, preferably silver, to complement the fruity flavors without overpowering them. 1/4 cup orange liqueur – Cointreau or triple sec work well here, adding a lovely citrusy kick to the mix. 1/4 cup fresh lime juice – Nothing beats the bright, zesty flavor of freshly squeezed lime juice, so skip the bottled stuff if possible. 2 tablespoons simple syrup – Adjust to taste; this can be more or less depending on how sweet you like your cocktails. 4 slices lime – For garnish, adding a pop of color and a zesty aroma. 4 slices prickly pear – A beautiful and tropical garnish that ties the whole cocktail together. Salt for rimming glasses – Optional, but a slight saline kick contrasts beautifully with the sweetness of the drink. How to Make Prickly Pear Margarita Follow these simple steps to prepare this delicious Prickly Pear Margarita: Step 1: Gather Your Ingredients Make sure you have all your colorful ingredients ready. It’s more fun to prepare when everything is in front of you, looking vibrant and inviting. Step 2: Make the Prickly Pear Puree If you’re starting with whole prickly pears, cut them in half and scoop out the flesh into a blender. Blend until smooth, and strain if you prefer a smoother texture. This vibrant pink puree is the star of your show. Step 3: Combine the Ingredients In a cocktail shaker, combine the prickly pear puree, tequila, orange liqueur, fresh lime juice, and simple syrup. Toss in some ice, and seal the shaker tightly. Step 4: Shake It Up Shake vigorously for about 15 seconds. You want to hear that ice clinking away while you envision yourself lounging on a beach somewhere. Step 5: Rim Your Glasses If you like the feel of salt on your lips, take one of the lime slices and rub it around the rim of your glass. Dip the glass into a plate of salt to coat the rim. Step 6: Strain and Serve Fill your prepared glasses with ice and strain the margarita mix equally into each glass. Garnish with a lime slice and a prickly pear slice for that Instagram-ready finish. Celebrate your accomplishment with an immediate tasting! Who could resist sipping on such a delightful concoction? A Prickly Pear Margarita is more than just a cocktail; it’s an experience that beckons you to unwind and indulge. Whether you’re sipping at sunset or mixing it up for friends, you’ll love how easy and refreshing this drink is for every summer occasion. So, gather your ingredients, shake away, and enjoy the delightful burst of flavors that come together in this spectacular drink. Cheers! Perfecting Prickly Pear Margarita Cooking Process To nail the perfect Prickly Pear Margarita, start by prepping all your ingredients, ensuring the prickly pear puree is ready. Then, mix everything in the shaker with ice before straining it into prepared glasses, finishing with garnishes for a refreshing sip. Add Your Touch to Prickly Pear Margarita Get creative with your Prickly Pear Margarita by swapping out the tequila for a flavored spirit like mezcal. You can also play with fruits such as mango or add a hint of spice with jalapeños to give it a twist. Storing & Reheating Prickly Pear Margarita For the best taste, store any leftover Prickly Pear Margarita in an airtight container in the refrigerator. Shake well before serving again to get that refreshing chill back, but it’s truly best enjoyed fresh. There was that one sizzling summer evening when I served these vibrant Prickly Pear Margaritas to friends at a backyard barbecue. Their delighted faces when they took the first sip? Priceless! It turns out nothing elevates a gathering quite like a tasty drink. FAQs About Prickly Pear Margarita What is Prickly Pear Margarita? A Prickly Pear Margarita is a vibrant cocktail that combines the unique flavor of prickly pear puree with refreshing lime juice, tequila, and orange liqueur. This drink perfectly balances sweet and tangy elements, offering a tropical twist on the classic margarita. The eye-catching pink color and garnishes like lime and prickly pear slices make it an attractive option for any gathering. Whether you’re celebrating a warm summer day or enjoying a cozy get-together, this drink elevates your bar experience with its deliciousness and flair. How do I make Prickly Pear Margarita? To make a Prickly Pear Margarita, start by combining one cup of prickly pear puree, half a cup of tequila, a quarter cup of orange liqueur, and fresh lime juice along with two tablespoons of simple syrup in a shaker filled with ice. Shake well and strain the mixture into rimmed glasses filled with ice. Finally, garnish with lime and prickly
How to Make Easy Big Mac Sauce in Just 5 Minutes

There’s something undeniably magical about dipping your fries in that luscious, tangy goodness known as Big Mac Sauce. It’s like a party in your mouth – a celebration of creamy mayo, zingy mustard, and the sweet surprise of pickle brine that dances on your taste buds. With a perfect balance of flavors, this sauce elevates burgers, fries, and pretty much everything else to new culinary heights. The best part? You can whip it up in just five minutes. I still remember the first time I tasted that delicious drizzle – it was at a backyard cookout, and I was both overwhelmed and entertained by the taste explosion! I’ve tried to replicate that moment ever since, and after some trial and error, I finally nailed the recipe. So, why go the fast-food route when you can enjoy homemade Big Mac Sauce that tastes just like the real deal? Whether you’re slathering it on a burger or using it as a dip for crispy fries, this is your new secret weapon in the kitchen. Ingredients for Big Mac Sauce Here’s what you’ll need to make this delicious Big Mac Sauce: 1 cup mayonnaise – The creamy base that brings all the flavors together elegantly. 2 tablespoons sweet pickle relish – Adds a delightful sweetness and crunch to the sauce. 1 tablespoon yellow mustard – Provides a tangy zing that balances the richness of the mayo. 1 tablespoon white wine vinegar – Enhances the sauce’s brightness and gives it that signature “snap.” 1 teaspoon garlic powder – Infuses a mellow garlic flavor without overwhelming the other ingredients. 1 teaspoon onion powder – Adds depth and warmth to the overall flavor profile. 1 teaspoon paprika – Gives the sauce a dash of color and a hint of smokiness. 1 teaspoon sugar – Balances the tanginess of the vinegar and mustard, creating a symphony of flavors. 1 pinch salt – The finishing touch to elevate the taste. How to Make Big Mac Sauce Follow these simple steps to prepare this delicious Big Mac Sauce: Step 1: Gather Your Tools Before we dive into the mixing, grab a mixing bowl and a whisk. If you’ve got a spatula or spoon handy, even better for scraping the bowl clean! Step 2: Combine the Ingredients In your mixing bowl, combine 1 cup of mayonnaise, 2 tablespoons of sweet pickle relish, 1 tablespoon of yellow mustard, 1 tablespoon of white wine vinegar, 1 teaspoon of garlic powder, 1 teaspoon of onion powder, 1 teaspoon of paprika, 1 teaspoon of sugar, and a pinch of salt. Step 3: Mix Until Smooth Grab your whisk and blend all the ingredients together. Make sure they’ve united harmoniously – you want a consistent, creamy mixture with no lumps. Step 4: Taste and Adjust Now comes the fun part! Give your sauce a taste. If you feel it needs more sweetness, add a pinch more sugar. For extra tang, a dash more vinegar could do the trick. Mix it well! Step 5: Chill and Let the Flavors Marry Transfer your sauce into an airtight container. Cover it and pop it in the fridge for at least 30 minutes to let those flavors meld beautifully. Step 6: Serve and Enjoy! Once chilled, it’s time for the grand reveal! Serve it alongside your favorite burgers, crispy fries, or even use it as a sandwich spread. Enjoy the homemade goodness! This easy Big Mac Sauce is not only a great dip but also a fun conversation starter, especially when you’re entertaining guests. Just watch as you blow their minds with your culinary prowess! Now you’ve got a quick, easy, and delicious recipe that brings back all the nostalgic flavors of those fast-food favorites—without the drive-thru line. So go ahead, dig in, and indulge in the sauce that dreams are made of! Perfecting Big Mac Sauce Cooking Process The best cooking sequence for making this delightful Big Mac Sauce is to gather all your ingredients first. Measure everything out, then mix the mayonnaise and condiments together before adding the spices for a uniform flavor. Add Your Touch to Big Mac Sauce Feel free to customize your Big Mac Sauce by swapping out sweet pickle relish for diced dill pickles, or add a hint of hot sauce for a spicy kick. Experiment with different mustards to find your perfect flavor. Storing & Reheating Big Mac Sauce To store your Big Mac Sauce, keep it in an airtight container in the refrigerator for up to a week. If you want to enjoy it warm, simply microwave for 10–15 seconds stirring well before serving. When I first made this sauce for my friends during a backyard BBQ, their faces lit up with nostalgia. It turned our simple burger night into a celebration of flavor that had everyone requesting the secret recipe! FAQs About Big Mac Sauce What is Big Mac Sauce? Big Mac Sauce is the creamy, tangy condiment famously used in the iconic Big Mac burger. It’s a unique blend of mayonnaise, sweet pickle relish, and a hint of mustard, combined with various spices to create an irresistible flavor profile. This sauce elevates burgers, sandwiches, and even salads, making it a versatile addition to your kitchen. Whether you’re enjoying a backyard BBQ or a cozy dinner at home, Big Mac Sauce is sure to add a delicious touch to your meals. How can I customize my Big Mac Sauce? You can easily customize your Big Mac Sauce to suit your taste preferences. Consider swapping out sweet pickle relish for diced dill pickles for a tangier profile, or add a dash of hot sauce for a spicy kick. You can also experiment with different types of mustard for varying depths of flavor. The beauty of this sauce is its versatility, allowing you to create a version that fits perfectly with your burgers or side dishes. How long can you store Big Mac Sauce? Big Mac Sauce can be stored in an airtight container in the refrigerator for up to a
Crispy Salt and Vinegar Fingerling Potatoes Recipe in 45 Minutes
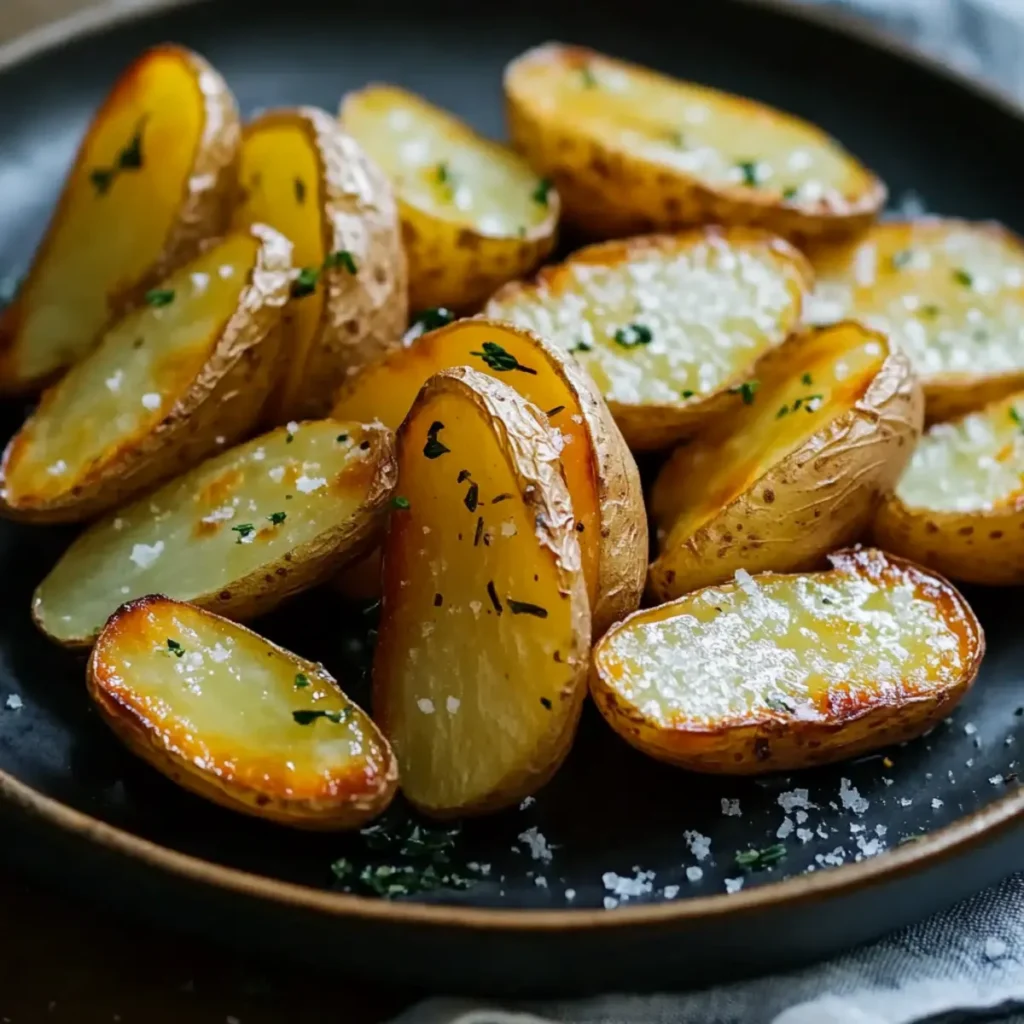
Salt and Vinegar Fingerling Potatoes are not just any side dish; they’re a sensational combination of tartness and crunch that has the power to elevate your meals from mundane to magnificent. Imagine biting into perfectly roasted potatoes that are crisp on the outside and soft on the inside, with all the zing of vinegar dancing on your taste buds. Yep, that’s the magic we’re talking about! Now, picture yourself gathering around a table with family or friends, each bite of these delightful Salt and Vinegar Fingerling Potatoes sparking joy and nostalgia. Whether you’re hosting a weekend barbecue or simply indulging in a cozy dinner at home, these little gems are bound to steal the show and leave everyone asking for the recipe. Trust me, the flavorful pleasure they bring will have you making these again and again! Ingredients for Salt and Vinegar Fingerling Potatoes Here’s what you’ll need to make this delicious Salt and Vinegar Fingerling Potatoes: 1.5 pounds fingerling potatoes – Look for vibrant, firm potatoes with smooth skin. Thin-skinned varieties will crisp up beautifully when roasted. 1/4 cup white vinegar – This adds a delightful tang that plays perfectly with the natural sweetness of the potatoes. 2 tablespoons olive oil – Extra virgin olive oil is best, helping to brown the potatoes while adding a lovely richness. 1 teaspoon sea salt – A must for flavor enhancement, sea salt will give your potatoes that satisfying savory kick. 1/2 teaspoon black pepper – Freshly cracked is preferable, adding a warm heat that beautifully complements the other ingredients. How to Make Salt and Vinegar Fingerling Potatoes Follow these simple steps to prepare this delicious Salt and Vinegar Fingerling Potatoes: Step 1: Preheat the Oven Kick things off by preheating your oven to 400°F (200°C). A well-heated oven is essential for that crispy exterior we all love! Step 2: Prep the Potatoes Grab a large bowl and throw in your fingerling potatoes. If they’re not already washed, be sure to give them a good scrub to remove any dirt. We want clean potatoes here! Step 3: Dress Up the Spuds Add the olive oil, sea salt, black pepper, and white vinegar to the bowl. Now comes the fun part—toss everything together! Use your hands (you can’t be afraid of a little mess) to ensure all the potatoes are evenly coated. Step 4: Lay Them Out Spread the dressed potatoes onto a baking sheet in a single layer. If they’re too crowded, you might end up with soggy spuds, and nobody wants that! Step 5: Roast Away Slide the baking sheet into the preheated oven and roast those beauties for about 30 minutes. About halfway through, give them a good flip to ensure they brown evenly and reach that desired crunchiness. Step 6: Serve and Enjoy! Once they’re golden brown and crispy, remove them from the oven and let them cool just a tad before diving in. Serve these Salt and Vinegar Fingerling Potatoes hot, and watch them disappear! You might be surprised at how easily these flavorful Salt and Vinegar Fingerling Potatoes come together, making them an ideal weeknight side or a star dish for entertaining. Not only are they simple to prepare, but they also pack a punch in flavor and make for a visually appealing plate. From the first bite to the last crumb, this dish is bound to be a crowd-pleaser! And if you thought fingerling potatoes were only a side dish, think again. You can mix and match these bad boys with various mains—from grilled meats to roasted veggies, or even as a stand-alone snack. They’re adaptable to any meal, and that’s what makes them true kitchen champions! Salt and Vinegar Fingerling Potatoes will undoubtedly become a staple in your culinary repertoire, bringing joy and deliciousness with each preparation. Enjoy your culinary adventure! Perfecting Salt and Vinegar Fingerling Potatoes Cooking Process To achieve perfect Salt and Vinegar Fingerling Potatoes, start by tossing the potatoes with the oil, vinegar, and seasonings. Then, spread them evenly on a baking sheet. Preheat the oven and let them roast until they’re crisp and golden. Add Your Touch to Salt and Vinegar Fingerling Potatoes Don’t hesitate to customize your Salt and Vinegar Fingerling Potatoes! Try adding garlic powder or rosemary for extra flavor, or switch up the vinegar for balsamic or apple cider for a unique twist. Storing & Reheating Salt and Vinegar Fingerling Potatoes Store leftover Salt and Vinegar Fingerling Potatoes in an airtight container in the fridge for up to three days. To reheat, spread them on a baking sheet and bake at 375°F (190°C) until warmed through and crispy again. I once made Salt and Vinegar Fingerling Potatoes for a family gathering, and the compliments just kept rolling in. My cousin, who usually hovers near the dessert table, found himself going back for more potatoes instead! FAQs About Salt and Vinegar Fingerling Potatoes What is Salt and Vinegar Fingerling Potatoes? Salt and Vinegar Fingerling Potatoes are a delightful twist on the classic roasted potato dish. This recipe combines the earthy flavor of fingerling potatoes with the tangy kick of vinegar and sea salt, creating a balance that’s both satisfying and unique. Roasting the potatoes at high temperatures allows them to become crispy on the outside while remaining tender and creamy on the inside. Perfect as a side dish or a snack, they are sure to impress your family and friends. How can I customize my Salt and Vinegar Fingerling Potatoes? Feel free to get creative with your Salt and Vinegar Fingerling Potatoes! You can add fresh herbs like rosemary or thyme for an aromatic touch. For a spicier kick, try sprinkling in some chili flakes. Additionally, switching up the vinegar can yield delightful variations – balsamic vinegar brings a hint of sweetness, while apple cider vinegar adds a fruity note. Each adjustment personalizes the dish, ensuring it suits your specific taste preferences. What are the best fingerling potatoes to use for this recipe? While many types of fingerling
Delicious Garlic Naan Bread Recipe You Can Make in 30 Minutes
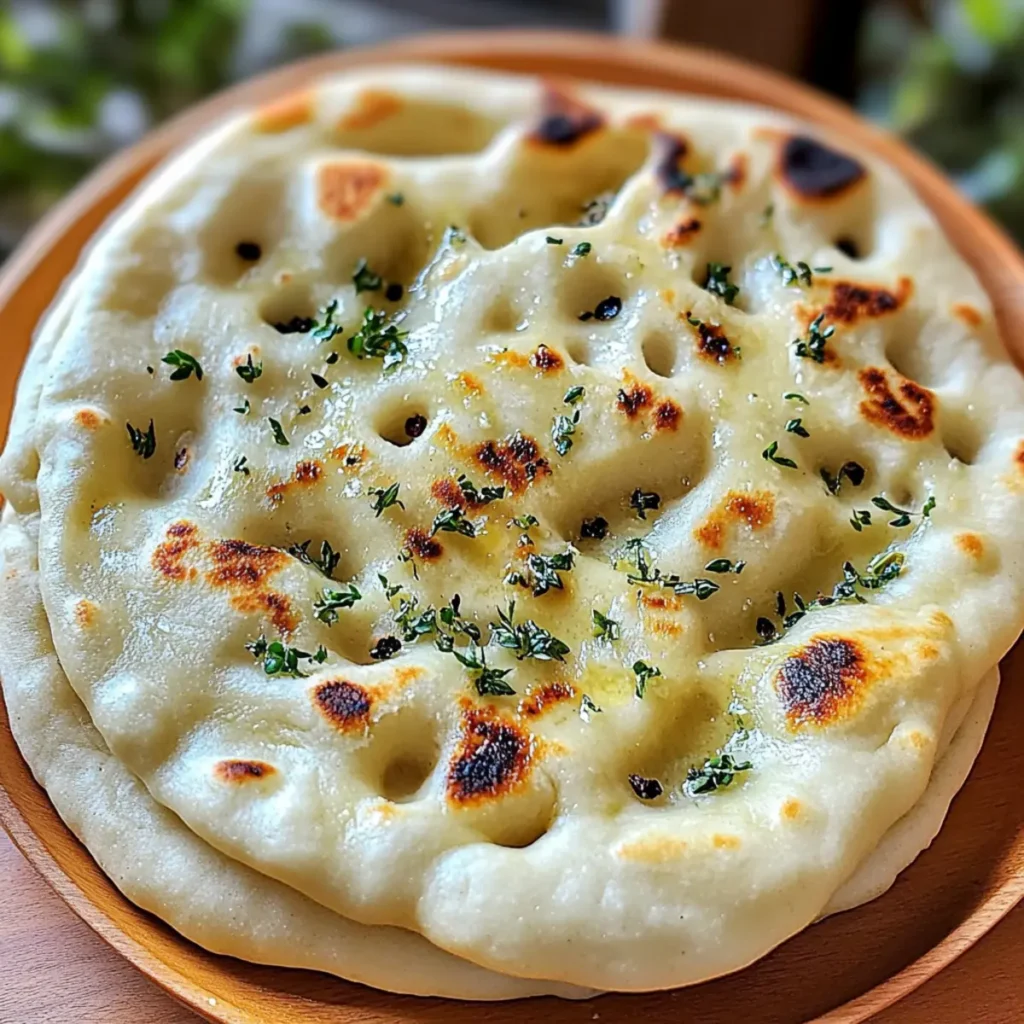
Garlic Naan Bread is that buttery, pillowy bread that dances on the tip of your tongue, delivering waves of warmth and flavor that can light up even the gloomiest of days. Imagine tearing off a piece and smothering it with aromatic garlic and fresh herbs, the scent wafting through your kitchen like a sweet invitation to a culinary adventure. This dish is perfect for any occasion, whether it’s a cozy night in with your favorite curry or an impressive side for the next dinner party. As you pull that golden-brown naan off the skillet, get ready for an explosion of flavors that’s both comforting and irresistible. Garlic Naan Bread evokes memories of evenings spent at Indian restaurants, laughing with friends and indulging in dishes so flavorful, you swear they have magical powers. So, dust off that apron and let’s whip up a batch of this delightful bread that will have you feeling like a rockstar chef in your own kitchen. Ingredients for Garlic Naan Bread Here’s what you’ll need to make this delicious Garlic Naan Bread: 2 cups All-purpose flour – Essential for the naan’s texture, use unbleached for a heartier flavor. 3/4 cup Warm water – Activates the yeast; make sure it’s not too hot or it may kill those tiny superheroes. 1 teaspoon Active dry yeast – This helps the naan rise and become wonderfully fluffy. 1 teaspoon Sugar – Feeds the yeast for a better rise and adds a touch of sweetness. 1 teaspoon Salt – Enhances flavor and balances the sweetness of the sugar. 1/4 cup Plain yogurt – Adds moisture and tang, giving the naan that authentic flavor. 2 tablespoons Unsalted butter – For that rich, buttery taste that elevates the naan to heavenly levels. 3 cloves Fresh garlic – Minced for maximum flavor impact; the more, the merrier! 2 tablespoons Chopped cilantro or parsley – For a fresh pop of color and flavor, adding that extra zing. How to Make Garlic Naan Bread Follow these simple steps to prepare this delicious Garlic Naan Bread: Step 1: Prepare the Dough In a bowl, combine the warm water, sugar, and active dry yeast. Let it sit for about 5-10 minutes until it starts to foam up like a science experiment gone right. This bubbly goodness means your yeast is alive and ready to work. Step 2: Mix the Dry Ingredients In a separate bowl, whisk together the all-purpose flour and salt. This mixture is the foundation of your naan, so give it a good stir to ensure the salt is evenly distributed. Step 3: Combine Ingredients Now it’s time to bring it all together! Add the yogurt, melted butter, minced garlic, and your frothy yeast mixture to the flour mixture. Stir until a dough starts to come together like a party in a bowl. Step 4: Knead That Dough Turn the dough out onto a lightly floured surface. Knead it for about 5 minutes until it’s smooth and elastic. This is a great time to channel your inner baker – imagine you’re on a cooking show and knead with passion! Step 5: Let It Rise Place the dough in a lightly greased bowl, cover it with a damp cloth, and let it rise in a warm spot for about 1 hour. It should double in size, which is always a fun surprise when you check on it! Step 6: Cook the Naan Once your dough has risen, preheat a skillet over medium heat. Divide the dough into small balls and roll each into a flat circle. Now, it’s time to cook! Place each naan on the skillet for about 2-3 minutes on each side until puffed and golden. The moment they puff up is pure magic! Now, grab your favorite curry, soak up that delicious sauce, and enjoy the fruits of your labor! This Garlic Naan Bread is perfect for sharing, although you might just want to keep it all to yourself. Trust me, you won’t regret it! Perfecting Garlic Naan Bread Cooking Process Before starting, mix the yeast, sugar, and warm water to activate it. While that bubbles away, combine flour and salt. Then, bring all the ingredients together, knead the dough, and let it rise while you prep the skillet for cooking those glorious naans. Add Your Touch to Garlic Naan Bread Feel free to switch up the yogurt for buttermilk, or add spices like cumin or coriander for a twist. You can also mix in shredded cheese or minced herbs into the dough for an extra flavor boost that’s all your own. Storing & Reheating Garlic Naan Bread Store your leftovers in an airtight container at room temperature for up to two days. To reheat, simply toss the naan into a dry skillet over medium heat for a minute or two on each side until warm and soft again. Sharing meals brings people together, and I remember a friend’s declaration of my naan being “better than any restaurant!” It’s heartwarming to see smiles while serving this delightful bread, proving that home-cooked love takes the cake—or should I say naan! FAQs About Garlic Naan Bread What is Garlic Naan Bread? Garlic Naan Bread is a traditional Indian flatbread that is soft, fluffy, and infused with the flavors of garlic. Made with simple ingredients like flour, yeast, yogurt, and of course, garlic, this bread is typically cooked in a tandoor but can easily be made at home on a skillet or in the oven. Its aromatic essence and buttery richness make it a perfect accompaniment to various dishes such as curries, stews, or even enjoyed on its own. How do you make Garlic Naan Bread at home? Making Garlic Naan Bread at home is simple and requires just a few essential steps. Start by activating your yeast with warm water and sugar. Mix all-purpose flour with salt, then combine it with yogurt, melted butter, minced garlic, and the yeast mixture to form a dough. After kneading and letting it rise, you roll it into
Easy Shrimp Cocktail Bites Recipe for Quick Appetizers

Shrimp Cocktail Bites are a sensational treat that can elevate any gathering, turning a simple cocktail party into an extravagant affair. Imagine succulent shrimp, perfectly cooked and sitting elegantly on the edge of a glass, lovingly adorned with zesty cocktail sauce and a sprinkle of fresh parsley. The aroma of fresh shrimp mingling with tangy sauce creates an olfactory delight that’s hard to resist. These delightful bites aren’t just a fancy appetizer; they hold a special place in my heart. I remember my grandmother whipping these up for family gatherings, her laughter blending with the clink of glasses as stories were shared. They’re easy to make and perfect for staving off the dreaded “whoa, what’s for appetizer?” moments at parties. Just imagine the scene: friends gathered around, trying to outdo each other in who can devour the most Shrimp Cocktail Bites. Get ready for a flavor explosion that will leave everyone asking for the recipe! Ingredients for Shrimp Cocktail Bites Here’s what you’ll need to make this delicious Shrimp Cocktail Bites: 1 lb large shrimp – Choose peeled and deveined shrimp for convenience and optimal flavor. Fresh or frozen works great, just ensure they are thawed if frozen. 1 cup cocktail sauce – A classic accompaniment for shrimp, this adds a zesty kick. You can use store-bought or craft your own for a personal touch. 2 lemon wedges – Fresh lemons add a bright, acidic contrast to the sweetness of the shrimp and enhance overall flavor. 2 tbsp fresh parsley – Chopped parsley adds a touch of color and fresh flavor, elevating the dish visually and taste-wise. How to Make Shrimp Cocktail Bites Follow these simple steps to prepare this delicious Shrimp Cocktail Bites: Step 1: Preparing the Shrimp If you’re using frozen shrimp, place them in a colander and run cold water over them for about 5 minutes to thaw. Ensure that the shrimp is peeled and deveined for that perfect bite. Step 2: Cooking the Shrimp Bring a pot of salted water to a rolling boil. Add the shrimp to the boiling water and cook for 2-3 minutes until they turn pink. This is sweet shrimp perfection, people! Once cooked, don’t forget to transfer them into an ice bath to stop the cooking process and retain that juicy texture. Step 3: Assembling the Bites Using small cocktail glasses or skewers, elegantly place one cooked shrimp on each. This isn’t just food; it’s a presentation masterpiece that will impress your guests. Step 4: Adding the Flavor Top each shrimp with a generous dollop of cocktail sauce right on top, or you can serve it in small bowls for dipping. Go ahead, make that sauce your best friend! Step 5: Final Touches Sprinkle freshly chopped parsley over the shrimp bites for a pop of color and freshness. Arrange lemon wedges scattered around the platter; their bright yellow will have mouths watering with anticipation. Step 6: Serve and Enjoy Serve your Shrimp Cocktail Bites immediately and watch them disappear like magic. They’re perfect for any occasion—from fancy dinners to casual get-togethers. Shrimp Cocktail Bites are a delightful treat that marries simplicity with elegance. They are quick to prepare, bursting with flavor, and visually stunning. You’ll find that whether it’s a game night with friends or a sophisticated soirée, these bites will be the hero of the appetizer spread. So roll up your sleeves, unleash your inner chef, and create these unforgettable shrimp sensations that will keep the party hopping and your guests clamoring for more. Enjoy the bubbly conversations, the laughter, and most importantly, the delicious shrimp cocktail experience! Perfecting Shrimp Cocktail Bites Cooking Process To achieve perfect Shrimp Cocktail Bites, start by boiling the shrimp in salted water while preparing the plating elements like cocktail sauce and garnishes. This ensures everything is ready simultaneously, creating a seamless cooking experience. Add Your Touch to Shrimp Cocktail Bites Feel free to swap the cocktail sauce for a zesty homemade version or add diced avocados for creaminess. Enjoy experimenting with different herbs like dill or cilantro for a fresh twist on your Shrimp Cocktail Bites. Storing & Reheating Shrimp Cocktail Bites For storage, place any leftover Shrimp Cocktail Bites in an airtight container in the refrigerator for up to two days. Reheat gently in a pan over low heat, ensuring they retain their juiciness without overcooking. Sharing Shrimp Cocktail Bites at a family gathering was a game-changer. Watching my Uncle Bob savagely devour them while declaring them “the best he’s ever had” added a pinch of joy that still makes me chuckle. FAQs About Shrimp Cocktail Bites What is Shrimp Cocktail Bites? Shrimp Cocktail Bites are delightful appetizers featuring succulent shrimp served alongside zesty cocktail sauce. This recipe takes the classic shrimp cocktail and transforms it into bite-sized pieces, perfect for parties and gatherings. Typically, the shrimp are quickly boiled and then chilled, creating a refreshing dish. The preparation is easy, making these bites a hit among seafood lovers and a fantastic choice for impressing your guests. How do I prepare Shrimp Cocktail Bites quickly? To whip up Shrimp Cocktail Bites in no time, start with thawed shrimp. Boil them in salted water for just 2-3 minutes until they turn pink. While the shrimp cool in an ice bath, prepare your cocktail sauce and any garnishes. This multitasking approach ensures everything is ready to go simultaneously, resulting in a seamless appetizer creation that takes around 15 minutes total. Can I customize my Shrimp Cocktail Bites? Absolutely! One of the best things about Shrimp Cocktail Bites is their versatility. You can swap the store-bought cocktail sauce for a homemade version featuring ingredients like horseradish, lemon juice, and hot sauce for an extra kick. Adding diced avocados or a sprinkle of fresh herbs like dill or cilantro can also bring an exciting flavor twist, making these bites uniquely yours. How should I store leftover Shrimp Cocktail Bites? If you have leftover Shrimp Cocktail Bites, store them in an airtight container in the refrigerator for
Delicious Mexican Shrimp Cocktail Recipe for Fresh Summer Appetizers
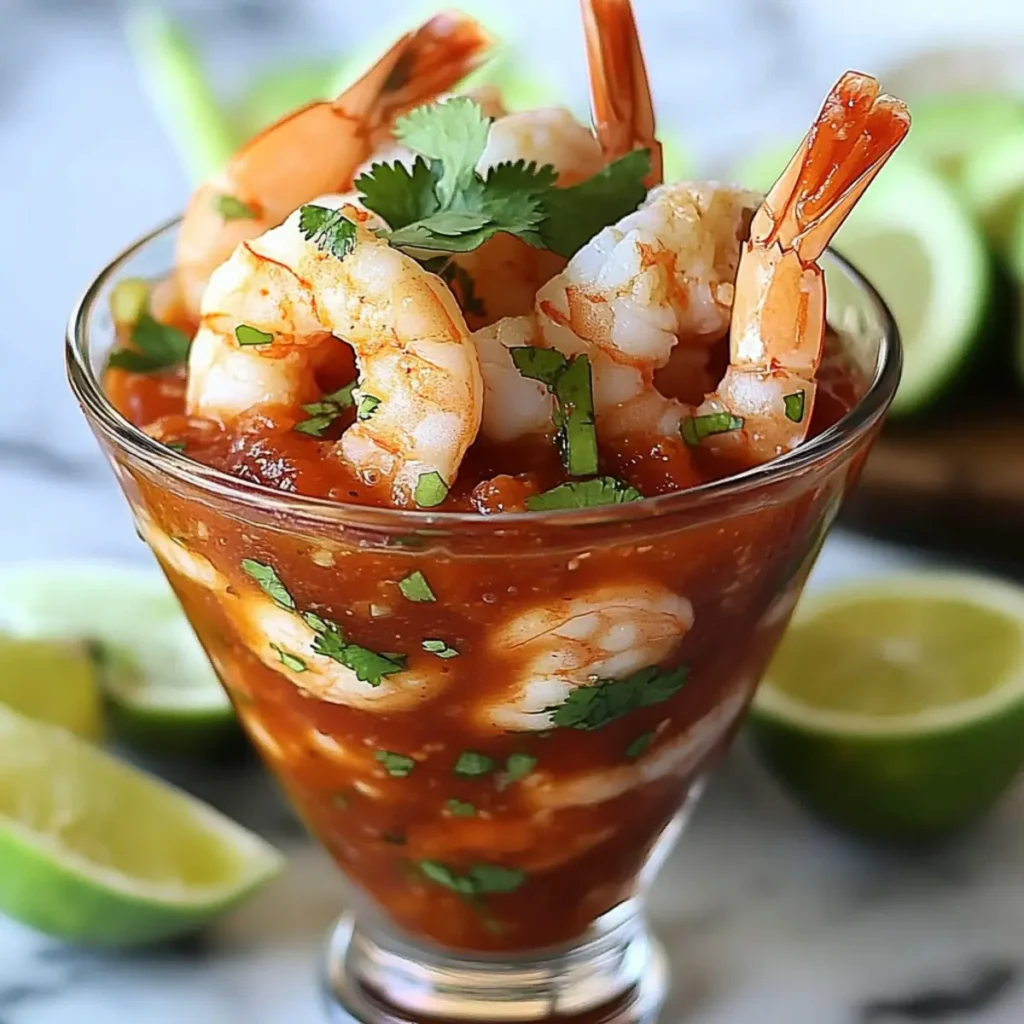
Get ready to tantalize your taste buds with the vibrant and refreshing flavors of Mexican Shrimp Cocktail. This dish is a sensational blend of perfectly poached shrimp, zesty lime, and colorful vegetables that transport you straight to a sun-soaked beach party. If you’re looking for a light and satisfying appetizer that’s packed with flavor, then let me introduce you to the summer staple of many Mexican seaside restaurants—Mexican Shrimp Cocktail. Imagine sinking your spoon into a bowl filled with juicy shrimp kissed by lime and infused with the fresh crunch of cucumbers, the sweetness of tomatoes, and a kick of heat from jalapeños. This is not just food; it’s a memory waiting to happen. Picture a sunny afternoon gathering with family and friends, where laughter fills the air, and you serve this cocktail alongside some salty tortilla chips. You’ll be crowned the life of the party in no time, right? Ingredients for Mexican Shrimp Cocktail Here’s what you’ll need to make this delicious Mexican Shrimp Cocktail: 1 lb large shrimp – Use fresh or frozen shrimp; if frozen, ensure they’re fully thawed and peeled before cooking. 1/2 cup freshly squeezed lime juice – Fresh limes provide the best flavor; bottled juice just can’t compare. 1/4 cup chopped fresh cilantro – This herb brings a refreshing burst of flavor that defines the dish; feel free to adjust according to taste. 1 cup diced ripe tomatoes – Choose juicy, in-season tomatoes for the best results; they add a natural sweetness. 1 cup diced cucumbers – Cucumber adds a crunch and lightness; English cucumbers work particularly well due to their mild flavor. 2 jalapeños – Adjust the heat level by using fewer jalapeños or removing the seeds, as they pack a punch of spiciness. 1/2 cup ketchup – Contrary to what you might think, this adds a subtle sweetness and balances out the acidity, creating a cohesive flavor. 2 tbsp hot sauce – Use your favorite brand for an extra zing; adjust to your spice preference. How to Make Mexican Shrimp Cocktail Follow these simple steps to prepare this delicious Mexican Shrimp Cocktail: Step 1: Prepare the Shrimp Rinse the shrimp under cold water and pat dry with a paper towel. In a large pot, boil salted water. Once it’s bubbling like a hot springs, toss in the shrimp and cook for about 2 to 3 minutes until they turn a beautiful pink. Drain the shrimp and quickly plunge them into an ice bath to stop the cooking process; nobody wants rubbery shrimp, right? Step 2: Chop the Veggies While the shrimp cools down, grab a cutting board and dice your tomatoes, cucumbers, and jalapeños into bite-sized pieces. Don’t forget to chop the cilantro as well and remember to smell it; it’s heavenly! Step 3: Combine the Ingredients In a large mixing bowl, combine the cooled shrimp, tomatoes, cucumbers, jalapeños, and cilantro. Now comes the fun part—squeeze in the lime juice, and add the ketchup and hot sauce. Gently mix everything with your hands or a spatula until each shrimp and veggie are coated in that zesty goodness. Step 4: Chill Out Cover the mixing bowl with plastic wrap and transfer it to the refrigerator. Let it chill for at least 30 minutes. This step is crucial as it allows the flavors to meld together into a symphony of deliciousness. Step 5: Serve with Crunch When you’re ready to impress, scoop the shrimp cocktail into individual bowls or cups. Serve it alongside crispy tortilla chips or classic saltine crackers. Trust me, your guests will be diving in faster than you can say “fiesta!” As a finishing touch, grab some extra lime wedges to squeeze over the top for that burst of citrus right before your guests take their first bite. It’s a refreshing dish perfect for sunny days, backyard barbecues, or even cozy nights in! This Mexican Shrimp Cocktail is a delightful addition to any gathering or just a way to treat yourself on a quiet evening. Remember, the blend of flavors and textures will have your guests asking for more—so be prepared to share your recipe for this delightful experience. Happy cooking! Perfecting Mexican Shrimp Cocktail Cooking Process To achieve the best results with your Mexican Shrimp Cocktail, start by boiling salted water for the shrimp. While the shrimp cooks to a perfect pink, prepare your vegetables and mix the sauce. This method keeps everything fresh and makes sure the shrimp don’t end up overcooked. Add Your Touch to Mexican Shrimp Cocktail Feel free to customize your Mexican Shrimp Cocktail by swapping out cucumbers for avocado or using a mango salsa for a sweet twist. Add a pinch of smoked paprika or some diced red onion for an extra kick that tantalizes the taste buds. Storing & Reheating Mexican Shrimp Cocktail Store any leftovers in an airtight container in the fridge for up to two days. Reheating is not recommended as shrimp can become tough. Instead, enjoy it cold, letting those flavors meld even further for your next snacking session. Sometimes I make this cocktail for family gatherings, and the way everyone finishes it before the main course never fails to bring a smile to my face. It’s truly a crowd-pleaser! FAQs About Mexican Shrimp Cocktail What is Mexican Shrimp Cocktail? Mexican Shrimp Cocktail is a vibrant and refreshing seafood dish that’s incredibly popular in Mexican cuisine. It typically features shrimp that are boiled to perfection, then mixed with fresh diced vegetables like tomatoes and cucumbers. A zesty combination of lime juice, ketchup, and hot sauce adds a thrilling kick to the cocktail. It’s often served cold, making it an ideal appetizer for summer gatherings, parties, or casual family dinners, ensuring a burst of flavor in every bite. How do I make the best Mexican Shrimp Cocktail? To make the best Mexican Shrimp Cocktail, start by ensuring your shrimp are fresh and properly cleaned. Boil them just until they turn pink, being careful not to overcook. While the shrimp cool, chop
Easy Garlic Broccoli Recipe for Perfectly Roasted Flavor
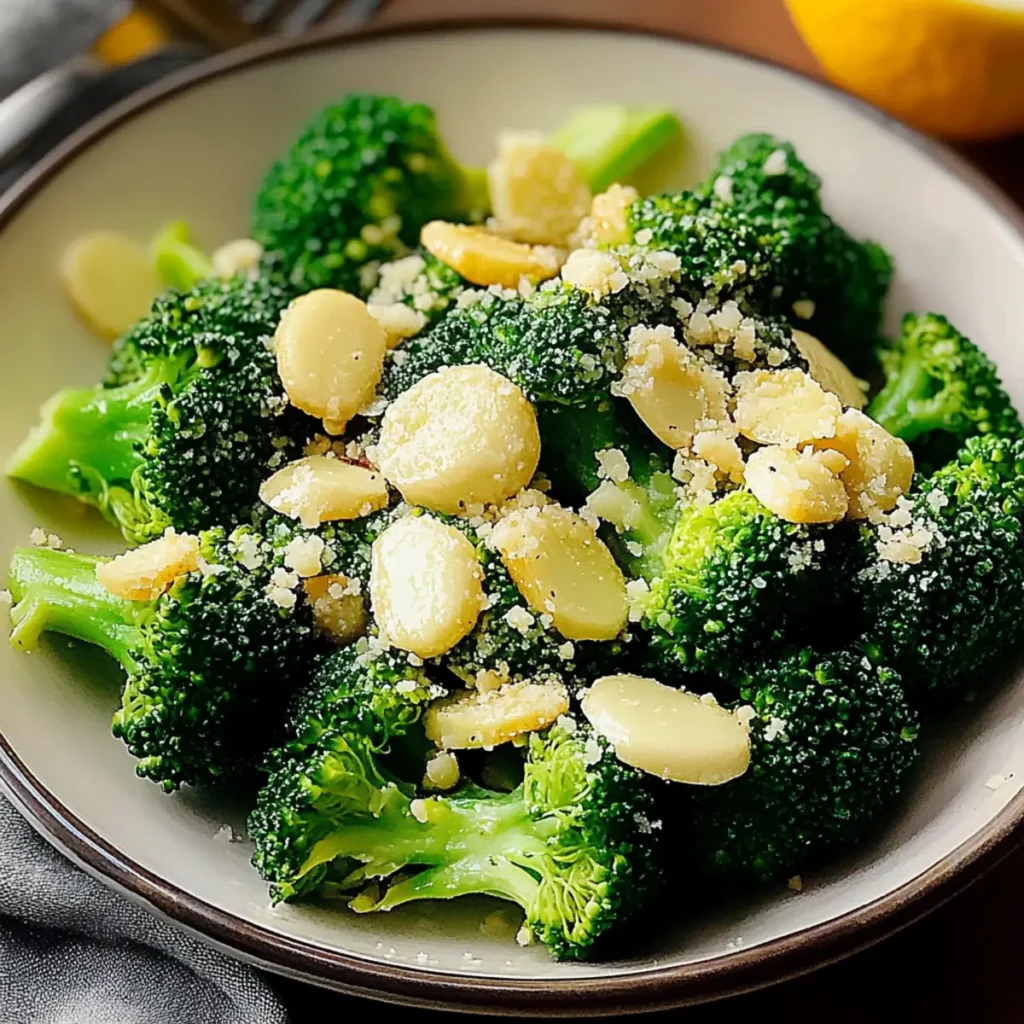
This delightful Garlic Broccoli is a culinary adventure waiting to happen, inviting you into a world filled with vibrant green hues and aromatic delights. Imagine the savory crunch of lovingly roasted broccoli, kissed by the warmth of garlic and olive oil—it’s a flavor explosion that transports you straight to your favorite cozy family dinners or lively gatherings with friends. Just picture those gatherings where the laughter flows as freely as the wine, and this dish steals the show. You know, the ones where someone claims to hate vegetables, but you catch them sneaking a second helping? That’s the magic of Garlic Broccoli. It’s not just food; it’s an experience that tantalizes your taste buds and leaves everyone smiling, eagerly anticipating the next bite. Ingredients for Garlic Broccoli Here’s what you’ll need to make this delicious Garlic Broccoli: 1 lb fresh broccoli florets – Choose bright green florets with firm stems, this ensures a crisp and vibrant dish. 4 cloves garlic, minced – Freshly minced garlic is essential for that perfectly aromatic and savory kick. 2 tbsp olive oil – Opt for a high-quality extra virgin olive oil to elevate the flavors, ensuring a rich, golden finish. ½ tsp salt – Enhances the natural flavors of the broccoli, balancing the dish beautifully. ¼ tsp black pepper – Adds just the right amount of zing to tantalize your taste buds. How to Make Garlic Broccoli Follow these simple steps to prepare this delicious Garlic Broccoli: Step 1: Preheat the Oven Begin by preheating your oven to 425°F (220°C). Getting the oven hot enough is key to achieving that crispiness we adore. Step 2: Prepare the Broccoli Wash and cut the broccoli into bite-sized florets. The smaller the pieces, the more surface area for that glorious roasting magic. Step 3: Toss It All Together In a large bowl, combine the broccoli florets with the minced garlic and olive oil. Toss it all together until every floret is lovingly coated. Sprinkle in the salt and black pepper, giving it another good toss to ensure even seasoning. Step 4: Spread and Roast Spread the broccoli mixture onto a baking sheet in a single layer. We want those beauties to roast, not steam! Slide this vibrant tray into your preheated oven and roast for 15-20 minutes until they’re crispy and caramelized. Step 5: Stir for Even Cooking About halfway through roasting, give your broccoli a good stir. This will help ensure those florets get that perfect golden-brown hue all over. Step 6: Serve and Enjoy Once done, serve warm and drizzle with any remaining garlic-oil goodness from the baking sheet. Your Garlic Broccoli is now ready to elevate any meal or delight as a standout star on its own. Let the flavor adventure begin! Whether it’s a side for dinner, a lunch companion, or a snack all on its own, this Garlic Broccoli is sure to please. Perfecting Garlic Broccoli Cooking Process Maximize efficiency by washing and cutting the broccoli first while preheating the oven. Toss the broccoli with garlic and olive oil next, ensuring even coating before roasting, which ensures that the flavors meld beautifully. Add Your Touch to Garlic Broccoli Feel free to jazz up your Garlic Broccoli with a sprinkle of red pepper flakes for heat, squeeze of lemon for freshness, or even a handful of grated cheese for an indulgent twist. Personalize it to fit your tastes. Storing & Reheating Garlic Broccoli Store any leftovers in an airtight container in the fridge for up to three days. When reheating, return it to the oven at 350°F (175°C) for about 10 minutes to regain the crispy texture. Sharing this recipe always draws compliments from friends at gatherings. They can’t believe how simple yet delicious it is, and it’s become my go-to for potlucks. FAQs About Garlic Broccoli What is Garlic Broccoli? Garlic Broccoli is a vibrant and flavorful vegetable dish made by roasting fresh broccoli florets with minced garlic and olive oil. This simple yet delicious recipe takes minimal ingredients and transforms them into a fantastic side dish that’s perfect for any meal. The garlic infuses the broccoli with a robust flavor, making it not only a healthy choice but also a tasty one. Roasting the broccoli at a high temperature brings out its natural sweetness and enhances its texture, giving you crispy edges and tender centers. How do I make Garlic Broccoli crispy? To achieve crispy Garlic Broccoli, start by preheating your oven to a high temperature, ideally 425°F (220°C). Cut the broccoli into even-sized florets to ensure uniform cooking. Toss the florets with olive oil, minced garlic, salt, and pepper, which helps in creating that crispy texture. Spread the broccoli in a single layer on your baking sheet without crowding them, and make sure to stir halfway through the roasting time for the best results. This technique guarantees a perfect balance of crispiness and caramelization. Can I customize my Garlic Broccoli recipe? Absolutely! One of the delights of Garlic Broccoli is its versatility. Feel free to add a pinch of red pepper flakes for some heat or a squeeze of fresh lemon juice for brightness. You can also sprinkle some grated Parmesan or a dollop of balsamic reduction for added depth and richness. The beauty of this dish is that it can adapt to your personal taste, allowing you to experiment with different seasonings or toppings that you adore. What are the health benefits of Garlic Broccoli? Garlic Broccoli offers a plethora of health benefits. Broccoli is packed with vitamins C and K, fiber, and numerous antioxidants that support immune function and overall health. Garlic, renowned for its heart-healthy properties, is associated with reduced blood pressure and improved cholesterol levels. The combination of these two powerhouse ingredients makes Garlic Broccoli a nutritious choice that can help boost your health while offering a savory, satisfying flavor profile. Conclusion for Garlic Broccoli In conclusion, Garlic Broccoli is not just a side dish; it’s a culinary experience that brings together simplicity and flavor.
Irresistible Chaat Masala Potatoes: Quick and Flavorful Recipe
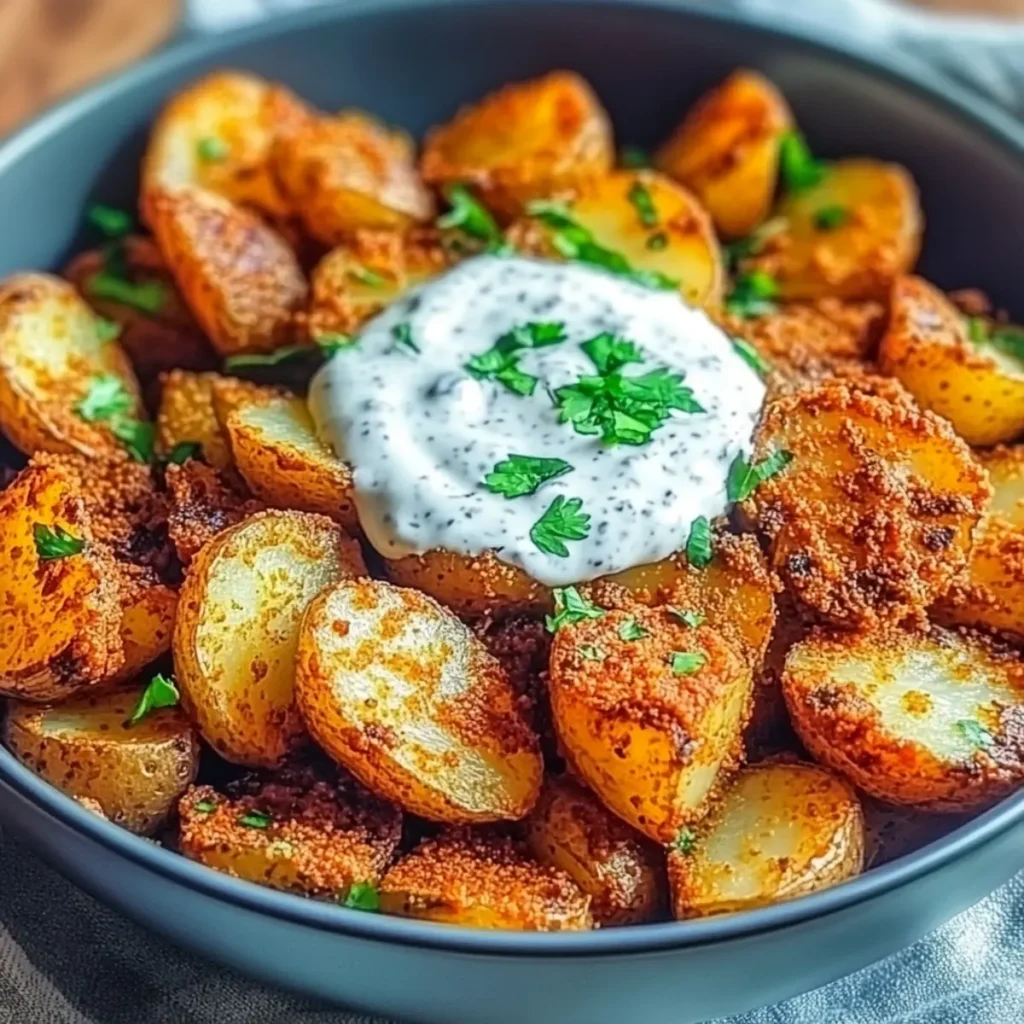
The aroma of spices wafting through your kitchen, the sizzle of crispy potatoes on the stove, and the punchy tang of chaat masala hitting your taste buds—that’s the kind of magic we’re conjuring up with Chaat Masala Potatoes. This dish transforms humble spuds into a flavor-packed delight that can charm even the pickiest of eaters. Imagine serving these bite-sized wonders at a dinner party or whipping them up for a casual weeknight snack that’ll have everyone asking for seconds! Now, every bite of these Chaat Masala Potatoes evokes memories of lively family gatherings, where laughter mingles with the clinking of glasses and the vibrant conversations around a table brimming with delicious food. Whether it’s game day or a cozy night in, these crispy, tangy potatoes are perfect for every occasion and will take your taste experience to the next level. Let’s jump into this recipe that promises not just to satisfy your cravings but also to impress your friends and family with minimal effort! Ingredients for Chaat Masala Potatoes Here’s what you’ll need to make this delicious Chaat Masala Potatoes: 4 medium Yukon gold or red potatoes – Choose potatoes that are firm and smooth for the best texture; Yukon gold offers a buttery flavor while red potatoes provide a slightly sweeter taste. 2 tablespoons chaat masala – This vibrant spice blend is made from a variety of spices including cumin, coriander, and dried mango powder. It adds a unique tangy flavor that elevates the dish. 1 teaspoon kosher salt – Essential for enhancing the natural flavors of the potatoes; kosher salt is preferred for its coarser texture, which makes it easy to sprinkle evenly. ¼ cup fresh cilantro, chopped – This herb adds a fresh, bright note to the dish; look for vibrant green leaves that aren’t wilting. Juice of 1 lemon – The acidity from fresh lemon juice balances the rich flavors and adds a zesty kick that keeps your palate refreshed. How to Make Chaat Masala Potatoes Follow these simple steps to prepare this delicious Chaat Masala Potatoes: Step 1: Prepare the Potatoes Begin by washing and peeling the potatoes. Cut them into mouthwatering bite-sized cubes that will be easy to fry and perfect for snacking. Step 2: Boil the Potatoes Place the potato cubes into a pot of salted water. Boil them for about 10-12 minutes, or until they are fork-tender but not falling apart. Once done, drain and let the potatoes dry for about 5 minutes for that crispy finish. Step 3: Season the Potatoes In a large bowl, combine chaat masala, kosher salt, and the drained potatoes while still warm. Add the fresh lemon juice and toss everything together until the potatoes are coated in those flavorful spices. Step 4: Fry the Potatoes In a frying pan, heat oil over medium heat. Fry the potato cubes in batches, ensuring they have room to crisp up. Fry them for about 5-7 minutes until they’re golden brown and irresistibly crispy. Resist the urge to overcrowd the pan! Step 5: Garnish and Serve Once the potatoes are beautifully fried, remove them from the pan and place them on a paper towel to absorb any excess oil. Garnish with freshly chopped cilantro and serve them hot with lemon wedges on the side for an extra zing of flavor! Every time I make these Chaat Masala Potatoes, I find myself in a tiny kitchen dance, waving my spatula around like I’m preparing a culinary masterpiece as the golden potatoes transform beneath the dancing flames. Trust me, once you try this recipe, it will become a beloved staple in your kitchen. Perfecting Chaat Masala Potatoes Cooking Process Start by boiling the potatoes to achieve a tender inside, then drain and season them while they dry. Fry them until golden brown for a deliciously crispy exterior that complements the spices beautifully. Add Your Touch to Chaat Masala Potatoes Feel free to swap in your favorite potatoes, experiment with different spice levels, or add extras like peas or paneer to give it your personal twist. Storing & Reheating Chaat Masala Potatoes Store any leftovers in an airtight container in the fridge for up to three days. Reheat them in a pan over medium heat to regain their crispiness before serving. Sometimes, I whip up Chaat Masala Potatoes for parties, and the compliments never fail to make me smile. It’s a simple recipe that sparks joy and plenty of happy memories shared around the table. FAQs About Chaat Masala Potatoes What is Chaat Masala Potatoes? Chaat Masala Potatoes are a delightful Indian snack made from boiled and fried potatoes seasoned with tangy chaat masala. This flavorful spice blend adds complexity and depth, delivering a burst of taste in every bite. The combination of crispy potatoes and zesty lemon juice creates a mouthwatering dish that can be enjoyed as an appetizer or part of a main meal. It’s a versatile recipe that showcases the balance of textures and flavors, making it a favorite among food enthusiasts. How do you store Chaat Masala Potatoes? To maximize freshness, store any leftover Chaat Masala Potatoes in an airtight container in the refrigerator. They can last for up to three days. When you’re ready to enjoy them again, reheat the potatoes in a frying pan over medium heat. This method helps regain their crispy texture, which can easily be lost when using a microwave. Alternatively, you can bake them in the oven for a few minutes if you want to revitalize their crunch. Can I make Chaat Masala Potatoes ahead of time? Yes, you can make Chaat Masala Potatoes ahead of time! To do this, boil and season the potatoes, then refrigerate them after they cool down. When you’re ready to serve, simply heat oil in a pan and fry the seasoned potatoes until they turn golden brown. Preparing the potatoes in advance can save you time and stress during gatherings, allowing you to enjoy quality moments with your guests while still serving a delicious dish. What
Delicious Loaded Mini Baked Potatoes: Easy Recipe for Appetizers

There’s nothing quite like the tantalizing scent of Loaded Mini Baked Potatoes wafting through your kitchen. Imagine golden-brown mini potatoes, tender and fluffy on the inside, generously crammed with creamy sour cream, sharp cheddar cheese, savory bacon bits, and a sprinkle of fresh green onions. Just thinking about it makes my mouth water, and I bet yours is too! Now, picture this: It’s game day, and you’re hosting your friends for the ultimate viewing party. What better way to keep everyone happy and fed than with these scrumptious Loaded Mini Baked Potatoes? Whether they’re served up as a crowd-pleasing appetizer or a delightful side dish, these little morsels of joy are bound to steal the show, leaving everyone begging for the recipe (and a second helping)! Ingredients for Loaded Mini Baked Potatoes Here’s what you’ll need to make this delicious Loaded Mini Baked Potatoes: 1 lb mini potatoes – Choose firm potatoes with no blemishes for the best texture. These bite-sized nuggets pack a lot of flavor. 2 tbsp olive oil – This will help achieve that lovely golden color and buttery flavor when baked. 1 tsp salt – Essential for bringing out the natural flavor of the potatoes. Don’t skip this! 1/2 tsp pepper – A little kick that enhances the overall flavor profile. 1/2 cup sour cream – Adds a creamy, tangy element that balances out the richness of the cheese and bacon. 1 cup shredded cheddar cheese – Go for sharp cheddar; it melts beautifully and adds a fantastic flavor. 1/4 cup chopped green onions – These offer a fresh crunch and a pop of color, making your potatoes look fabulous. 1/4 cup bacon bits – Because everything is better with bacon! You can use homemade or store-bought, whichever suits your fancy. How to Make Loaded Mini Baked Potatoes Follow these simple steps to prepare this delicious Loaded Mini Baked Potatoes: Step 1: Preheat Your Oven Preheat your oven to 400°F (200°C) and line a baking sheet with parchment paper. This will help with easy cleanup once your delicious potatoes have finished baking. Step 2: Prepare the Potatoes Wash the mini potatoes thoroughly to remove any dirt. Use a fork to pierce each potato several times; this allows steam to escape while baking and prevents any unfortunate potato explosions. Step 3: Season the Potatoes In a mixing bowl, toss the cleaned potatoes with olive oil, salt, and pepper until they are evenly coated. Feel free to get your hands in there; it’s fun! Step 4: Bake to Perfection Arrange the seasoned potatoes on the prepared baking sheet and bake for 30-35 minutes, or until they are golden brown and fork-tender. Your kitchen will start to smell heavenly at this point. Step 5: Create the Potato Pocket Remove the baked potatoes from the oven and allow them to cool slightly. Slice each potato in half lengthwise and gently squeeze the ends to create a pocket. Be careful not to burn yourself! Step 6: The Delicious Fillings Fill each potato half with a dollop of sour cream, a generous amount of cheddar cheese, a sprinkle of green onions, and a handful of crispy bacon bits. The sight of these loaded little gems will surely make your heart skip a beat! Step 7: Melt the Cheese Return the loaded mini potatoes to the oven for another 5 minutes, until the cheese is deliciously melted and gooey. As they bake, you can take in the blissful aroma and prepare yourself for the taste sensation to come. Serve these Loaded Mini Baked Potatoes warm, perhaps with an extra sprinkle of green onions on top for garnish. They make a perfect addition to any gathering, and I can promise you, they don’t last long on the table! Now that you have the recipe, it’s time to roll up those sleeves and get cooking. You’ll have everyone swooning with delight over these Loaded Mini Baked Potatoes, with their enticing flavors and creamy textures. It’s time to indulge and elevate your potato game! Perfecting Loaded Mini Baked Potatoes Cooking Process Start by preheating your oven while washing and piercing the mini potatoes. Toss them with olive oil, salt, and pepper, then bake them before slicing and stuffing. Finally, return to the oven to melt the cheese for perfect Loaded Mini Baked Potatoes. Add Your Touch to Loaded Mini Baked Potatoes Feel free to swap out the toppings based on your preferences. Try Greek yogurt instead of sour cream, switch the cheese varieties, or add jalapeños for a spicy kick. Your creativity will make these Loaded Mini Baked Potatoes even more exciting! Storing & Reheating Loaded Mini Baked Potatoes Store any leftover Loaded Mini Baked Potatoes in an airtight container in the fridge for up to three days. Reheat them in the oven or microwave until warmed through while keeping the cheese ooey-gooey and delicious. Sharing Loaded Mini Baked Potatoes with friends on game night was unforgettable. Their delighted faces were worth every minute spent in the kitchen, and now they request these spuds at every gathering! FAQs About Loaded Mini Baked Potatoes What are Loaded Mini Baked Potatoes? Loaded Mini Baked Potatoes are a delightful twist on the classic baked potato, utilizing tiny potatoes for a fun and personal touch. Each potato is baked until golden brown and fluffy and is then sliced in half and filled with a delicious combination of toppings such as sour cream, shredded cheddar cheese, green onions, and crispy bacon bits. These little gems make for an irresistible appetizer or a hearty side dish, perfect for gatherings or family dinners. How do I prepare Loaded Mini Baked Potatoes? Preparing Loaded Mini Baked Potatoes is a straightforward process. Start by preheating your oven and washing the mini potatoes thoroughly. After piercing them with a fork, toss them with olive oil, salt, and pepper to ensure flavor throughout. Bake until golden brown and tender, then slice and thoroughly stuff with your desired toppings before a final bake to melt the cheese.